Steps Overview
1️⃣ Set up Google Cloud Console → 2️⃣ Create credential in N8N → 3️⃣ Create workflow in N8N → ✅ Done!
Prerequisites
- Free Gmail account
- Free Google Cloud Console account (no need to activate free trial)
- Publicly available N8N under custom domain (Don't have one? Get yours for free here)
Step 1: Log in to Google Cloud Console (GCC)
- Make sure you're logged in with the Google account you'd like to use (or register a new one).
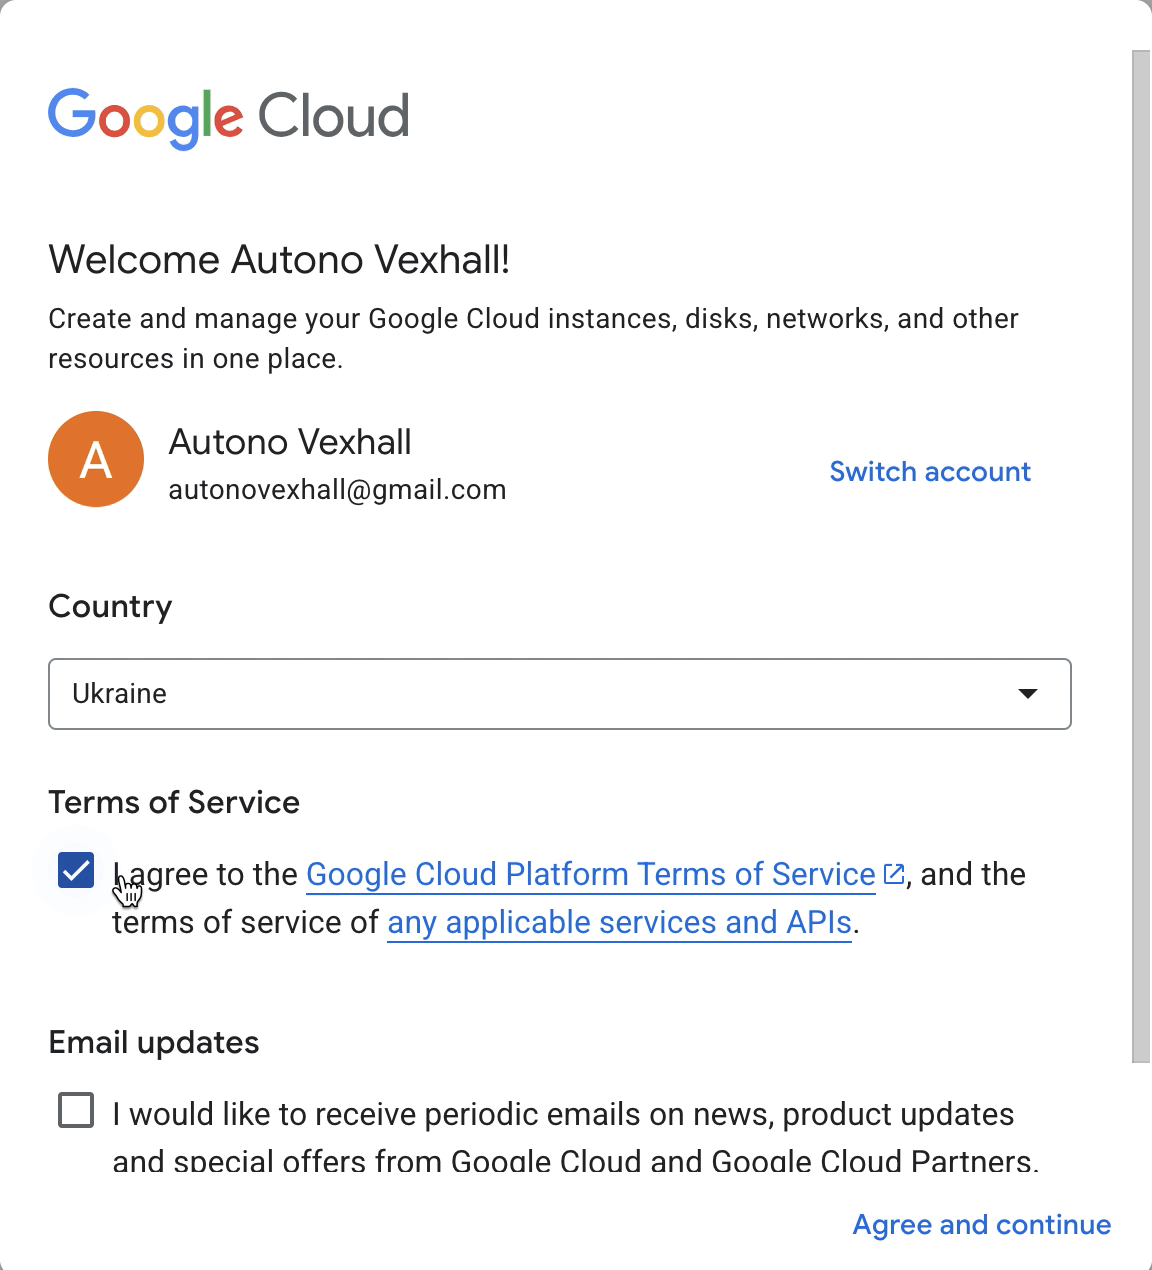
- Open Google Cloud Console and agree to Terms of Service, click "Agree and Continue"
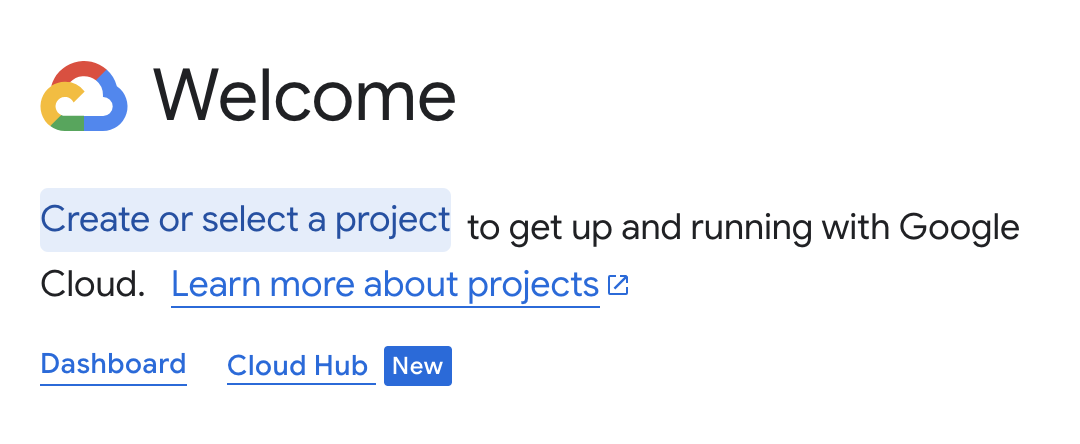
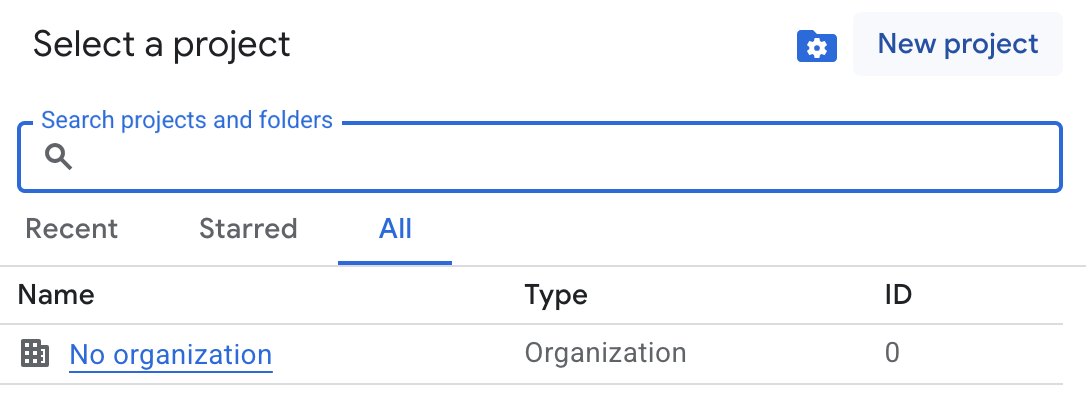
- Click "Create or select project", then "New project"
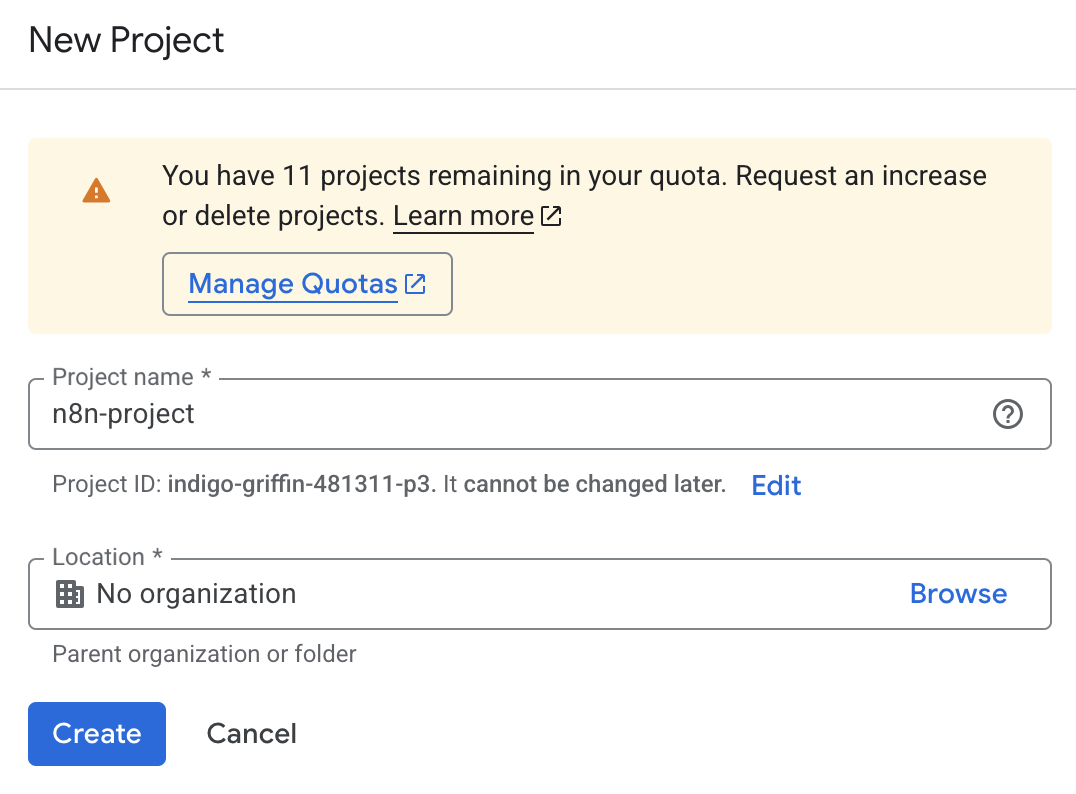
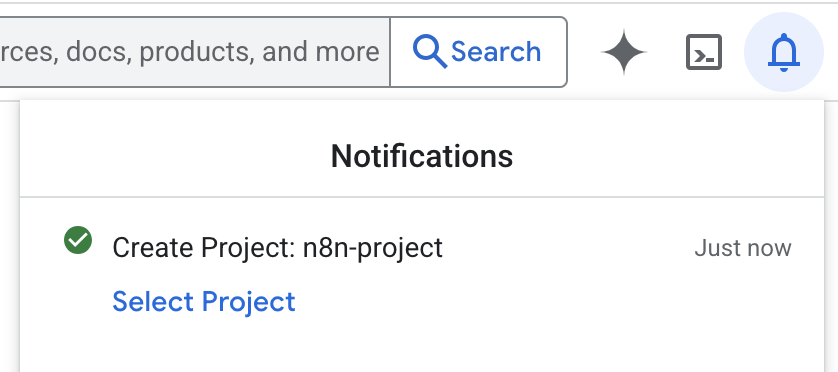
- Input project name, for example "n8n-project", click "Create"
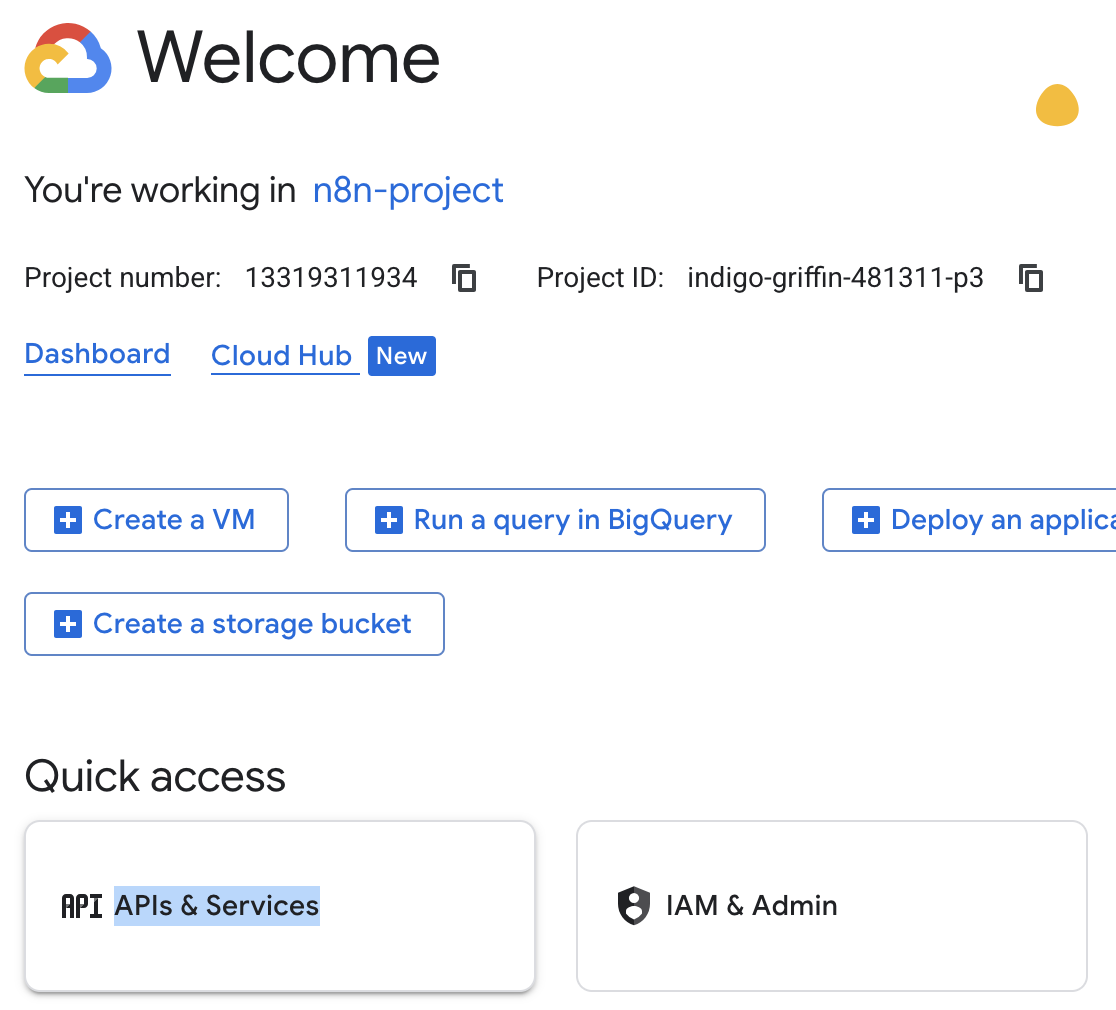
- Wait for it to finish creating and click on "Select project" in notifications window
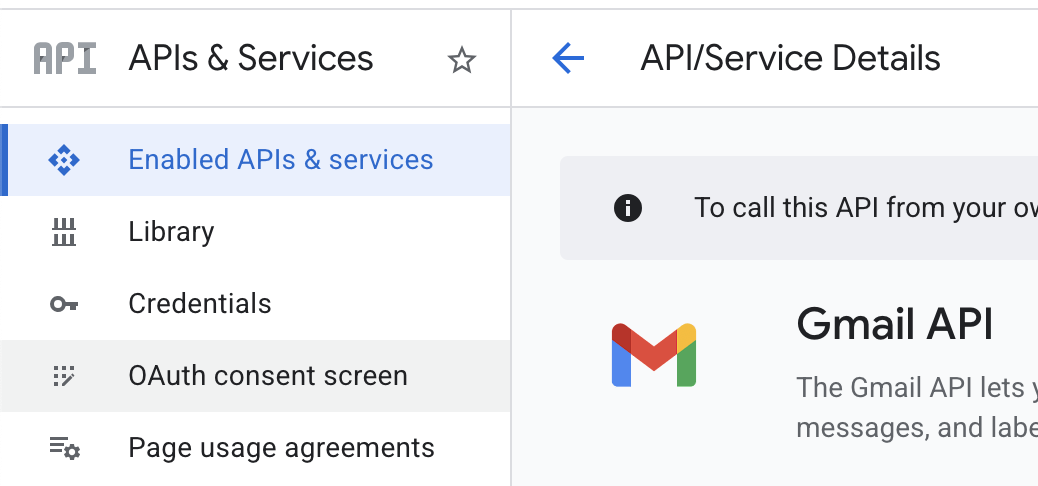
- Click "APIs and Services"
- Click "Enable APIs and Services" button

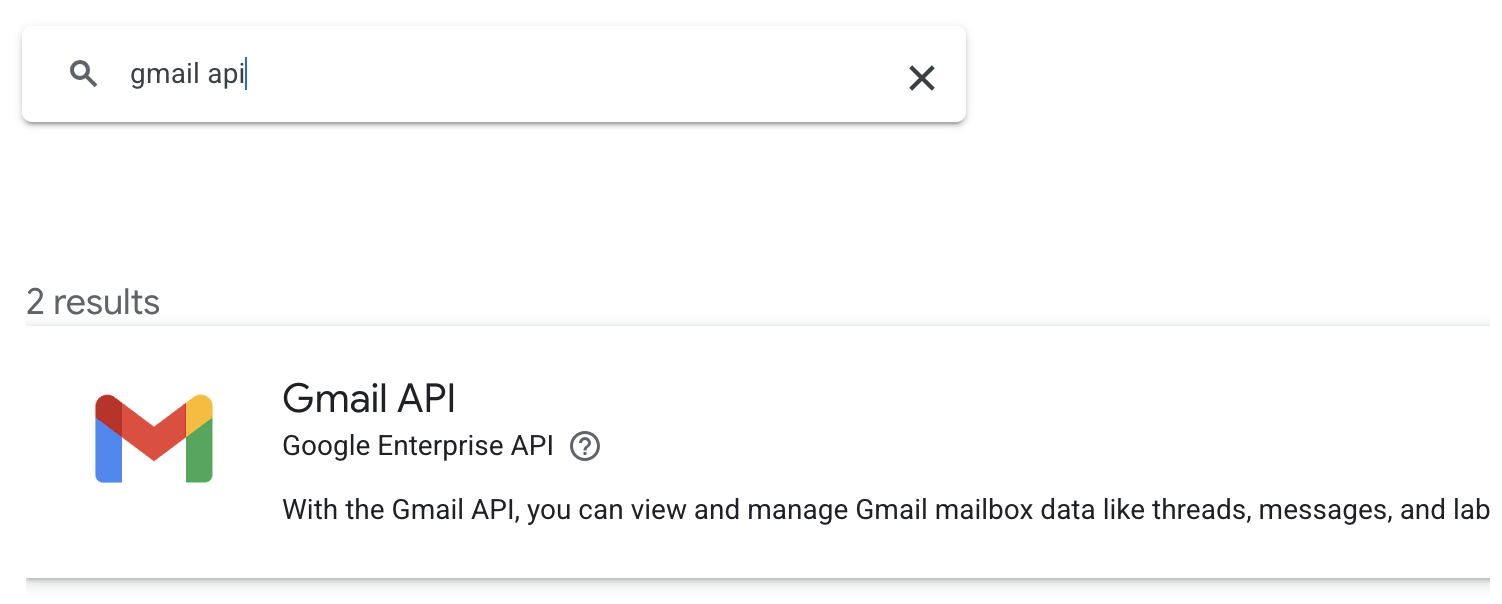
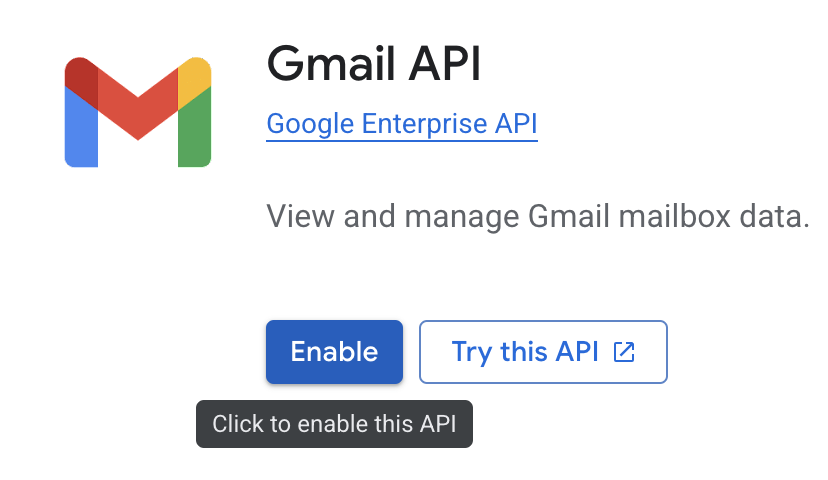
- Search for "gmail api" and click on it. Then click "Enable"
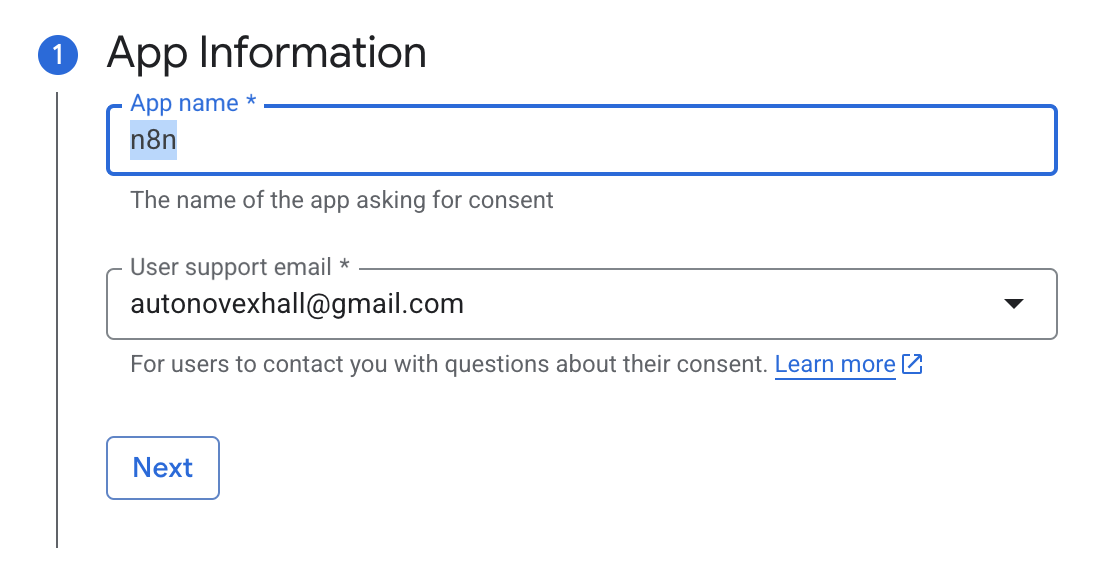
- Click on "OAuth consent screen" at the sidebar, then click on "Get started"
- Input project's name, for example "n8n" and select your email, click "Next"
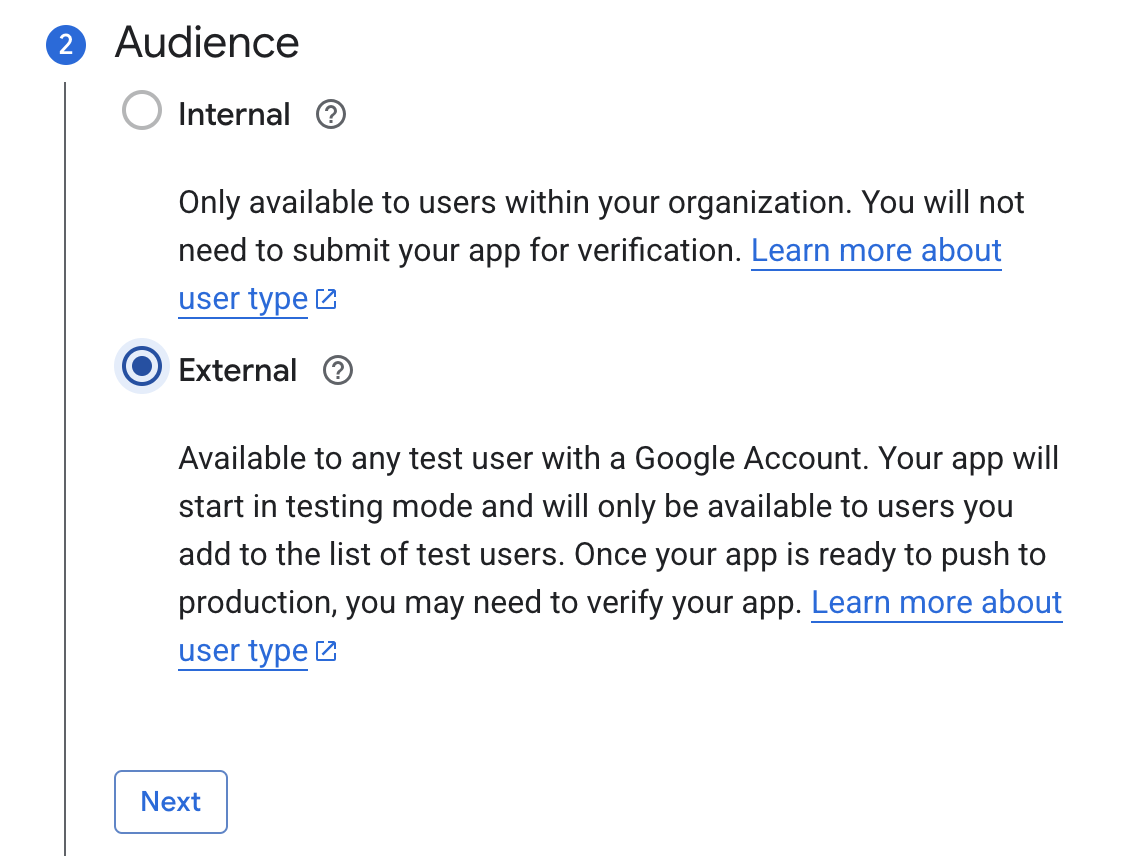
- On the "Audience" step select "External", click "Next"
- On the "Contact information" write your email again, then proceed to "Finish" and click "Create"

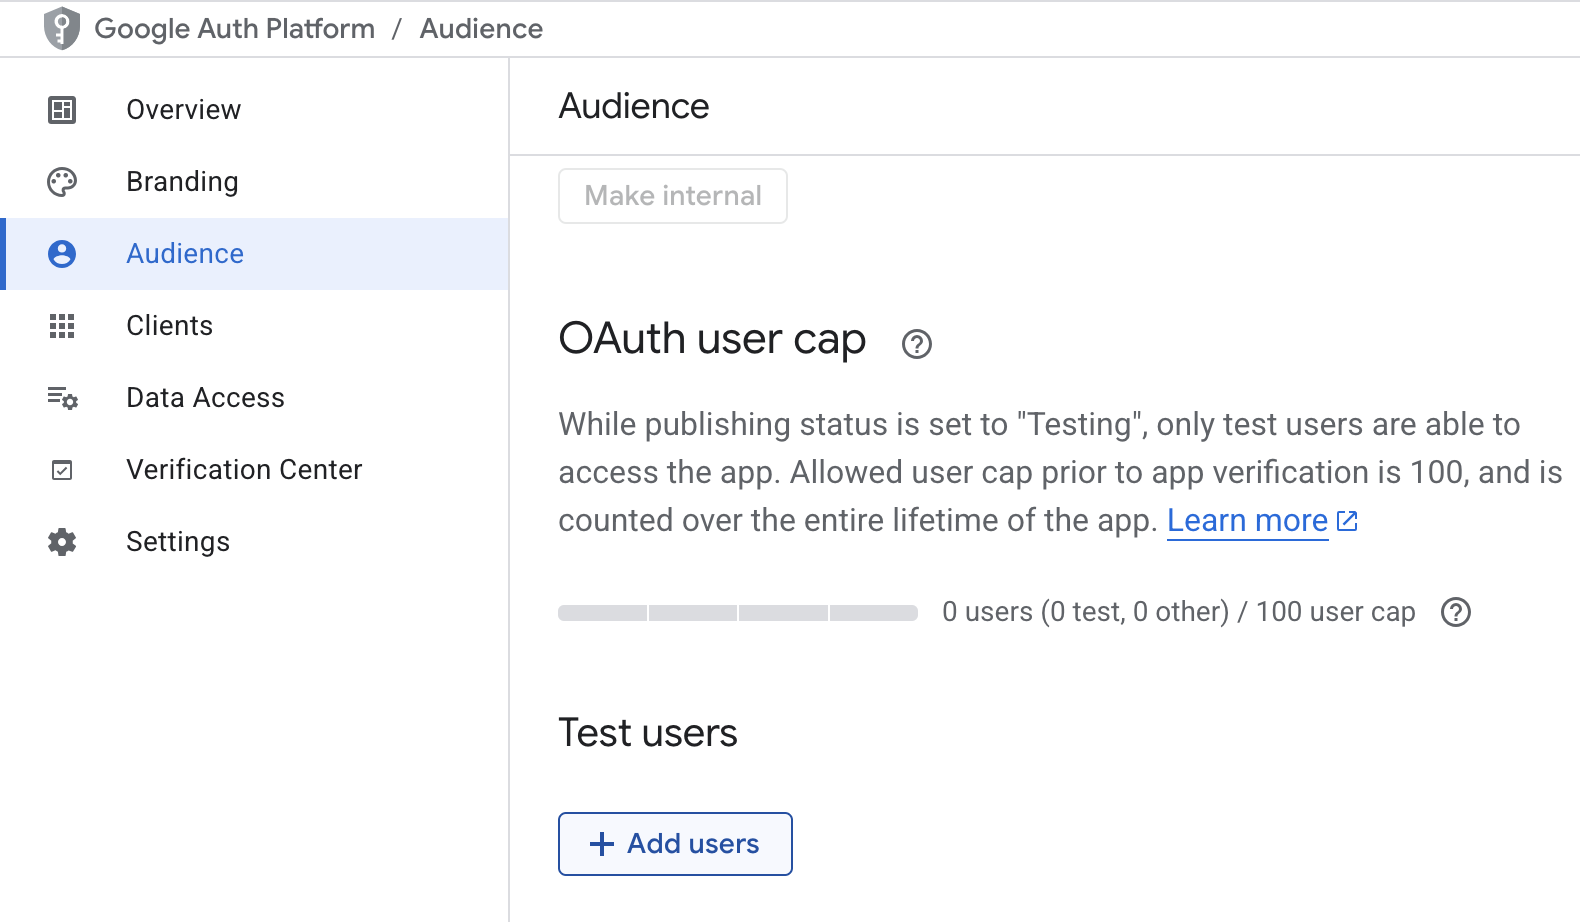
- Click on the "Audience" in the sidebar and scroll down to "Test users", click "Add users". Add your email and click "Save".
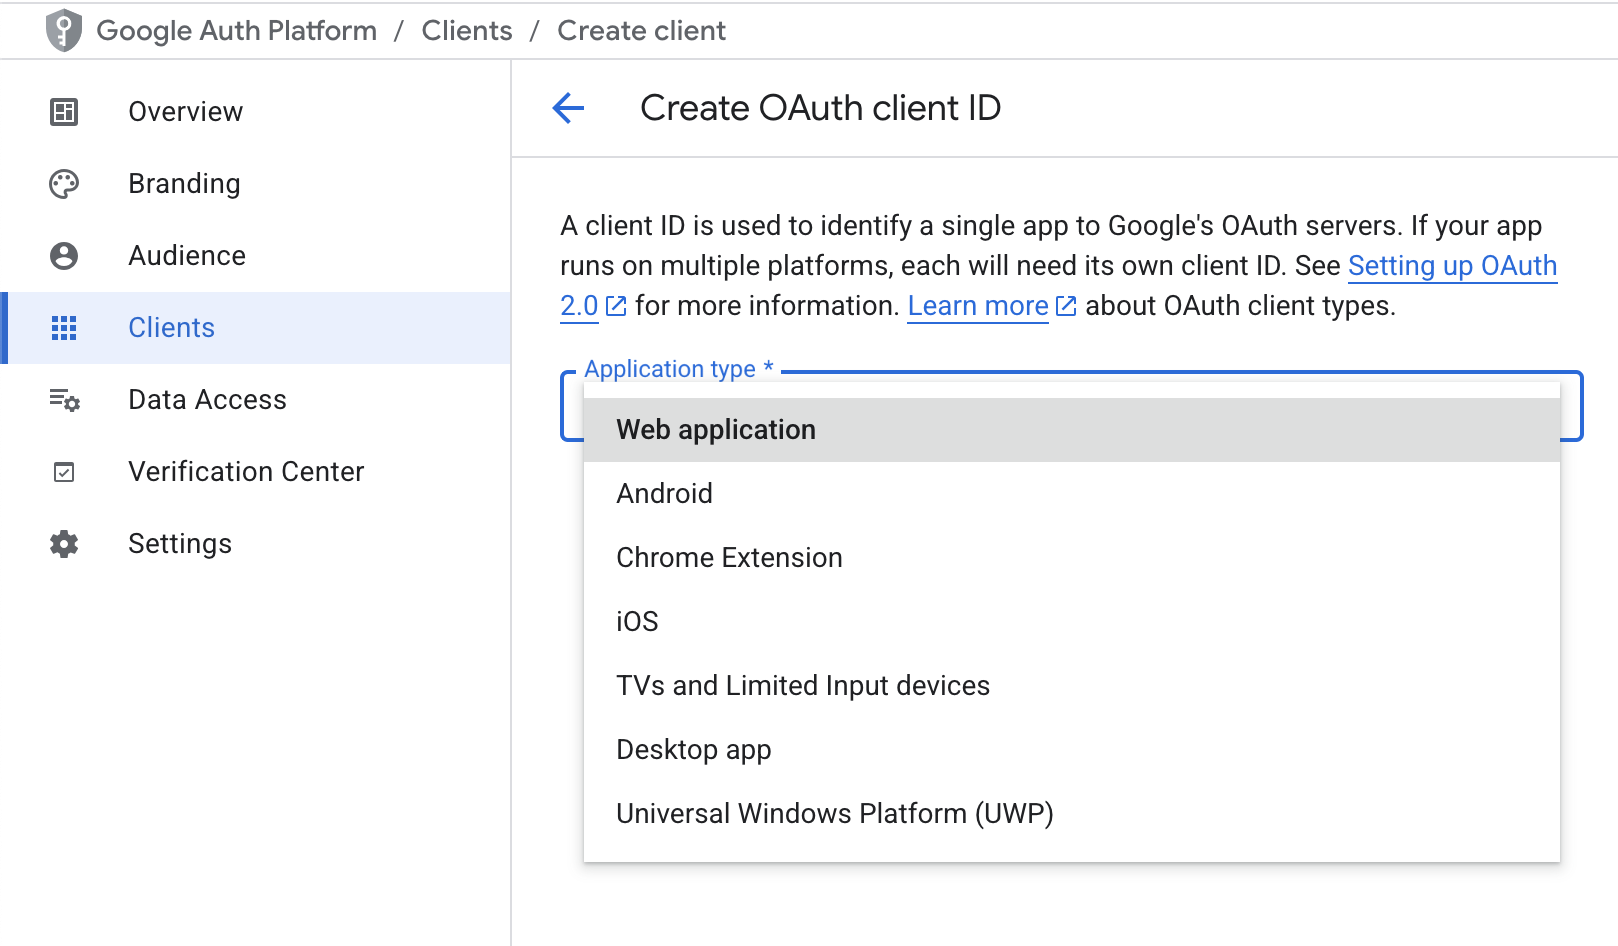
- Click on the "Clients" in the sidebar, "Create client", choose Application type = "Web application".
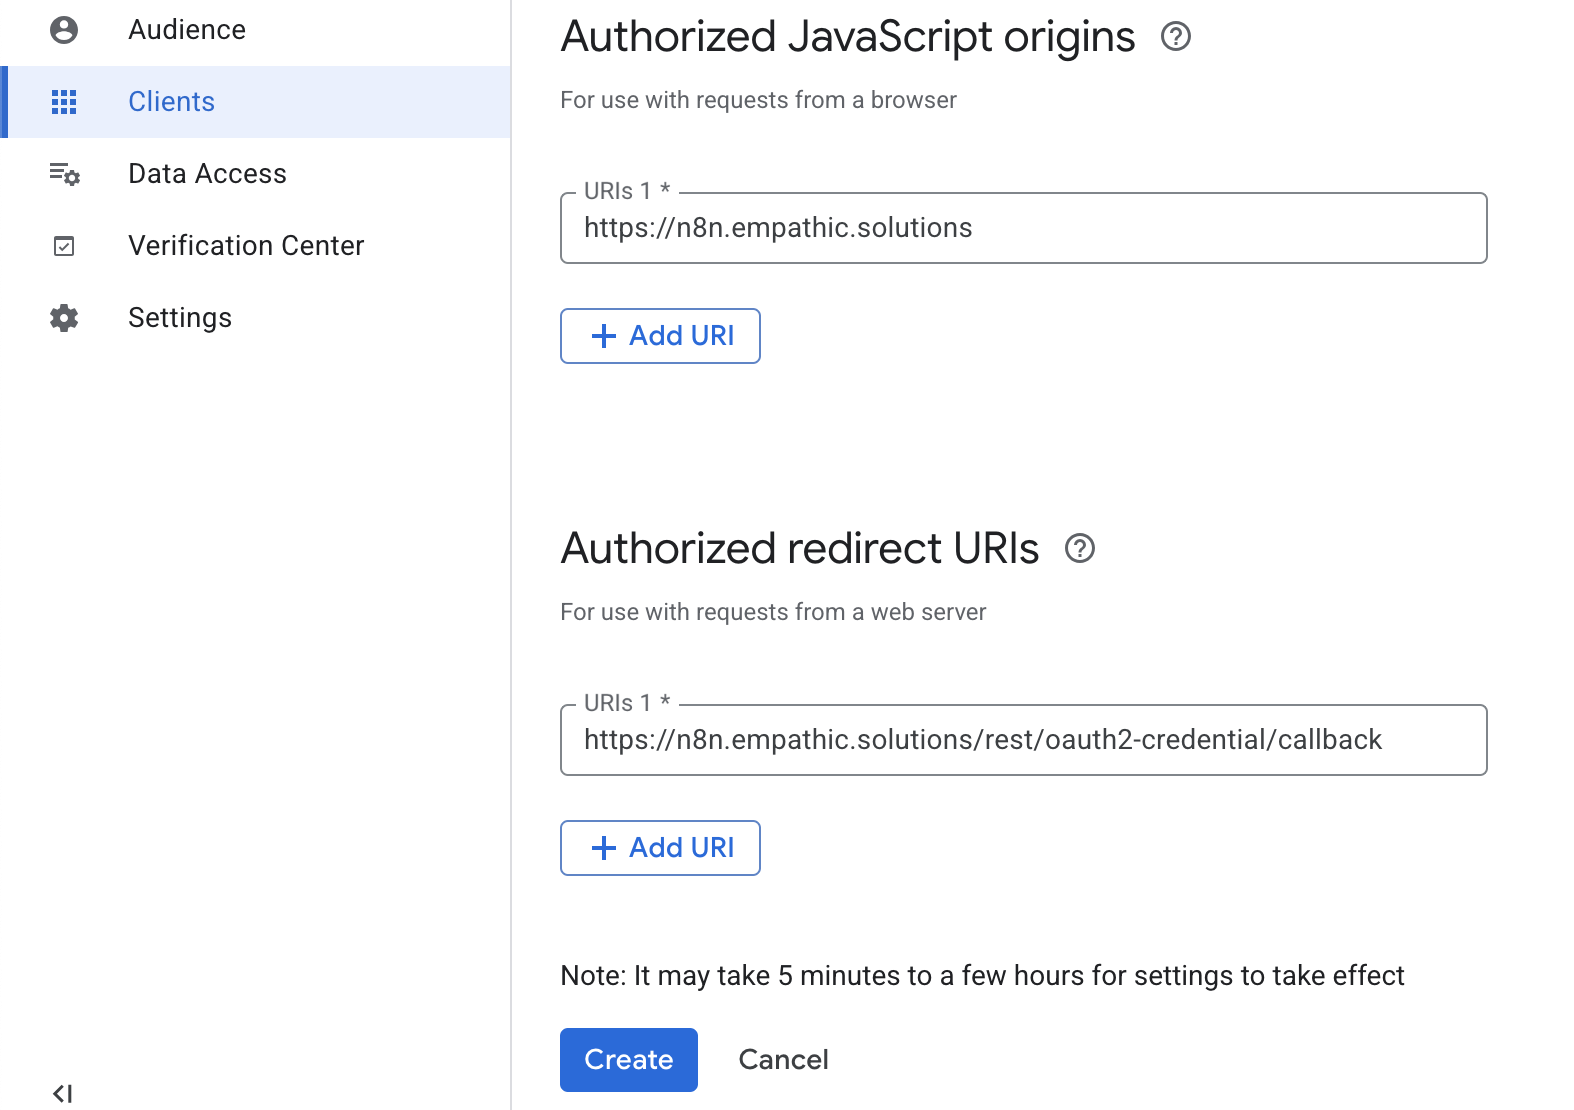
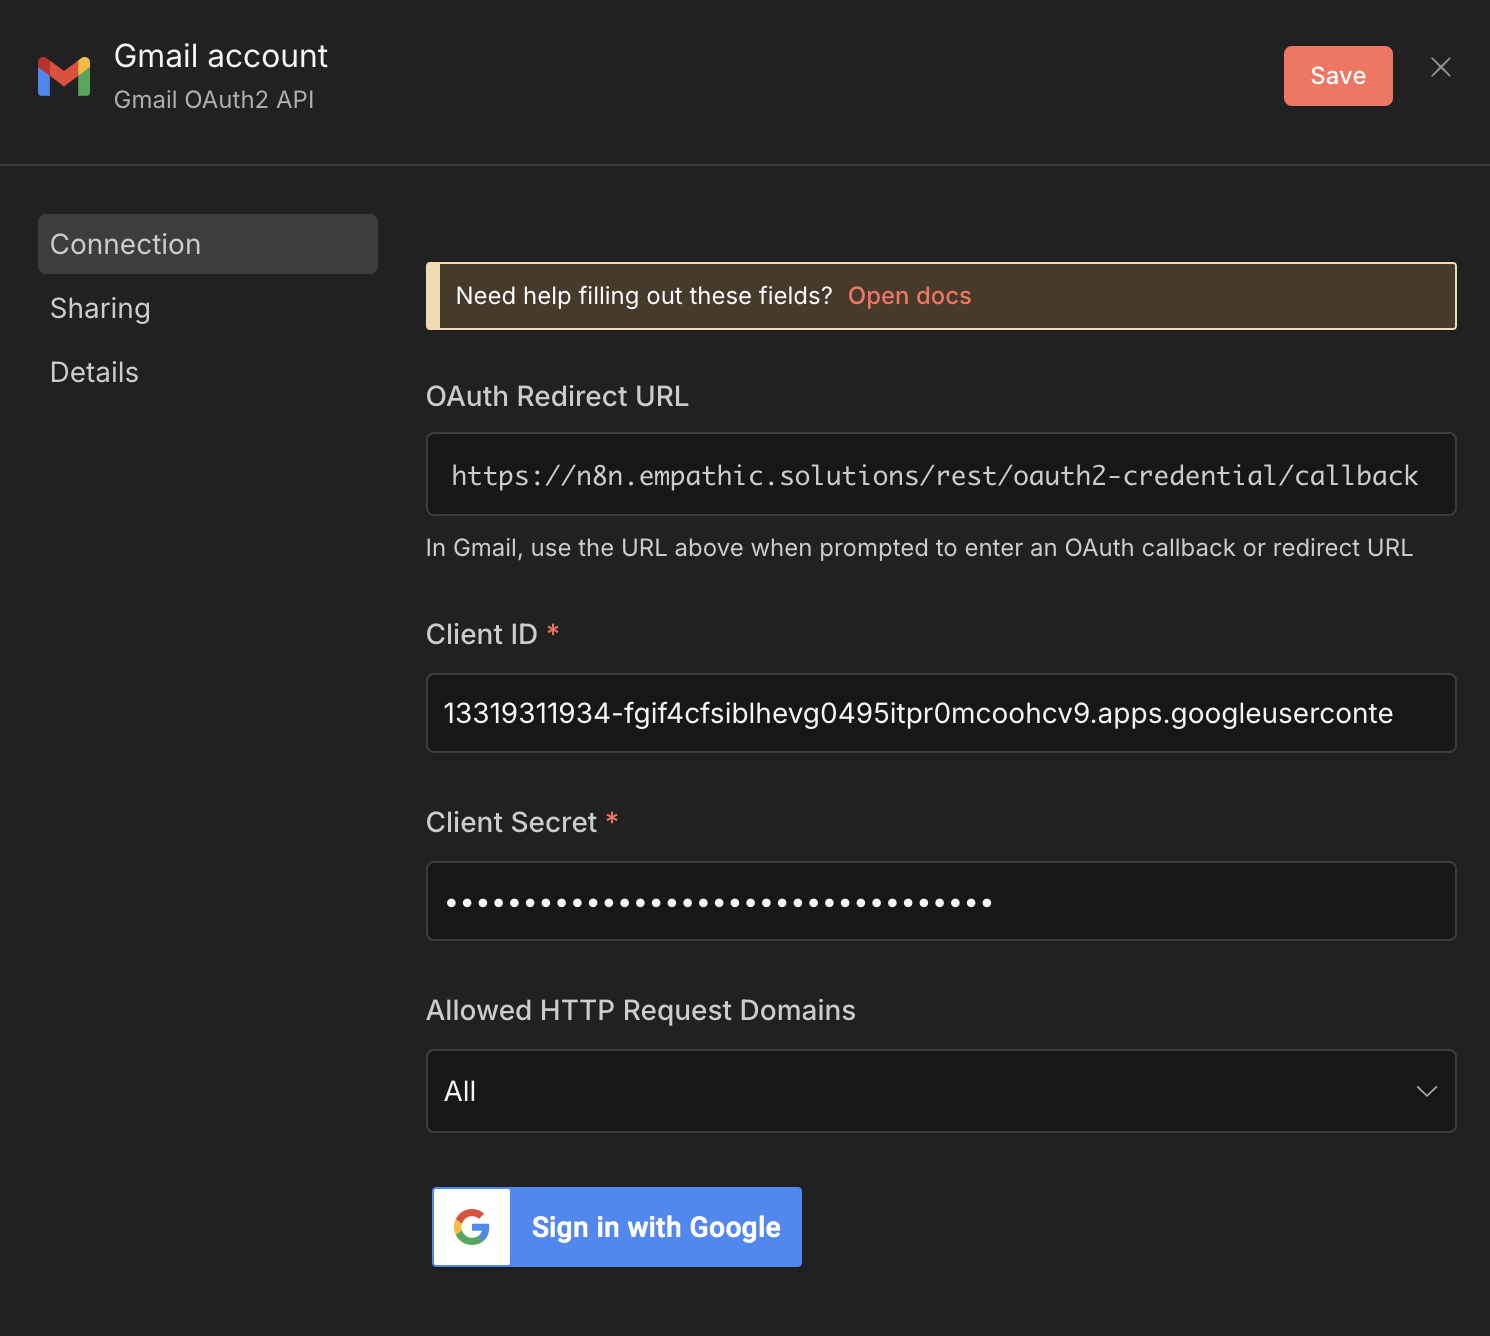
- Scroll down to "Authorized JavaScript origins" and put there https://YOUR_N8N_DOMAIN. In "Authorized redirect URIs" put your domain append with the following path: /rest/oauth2-credential/callback (see screenshots). Click "Create".
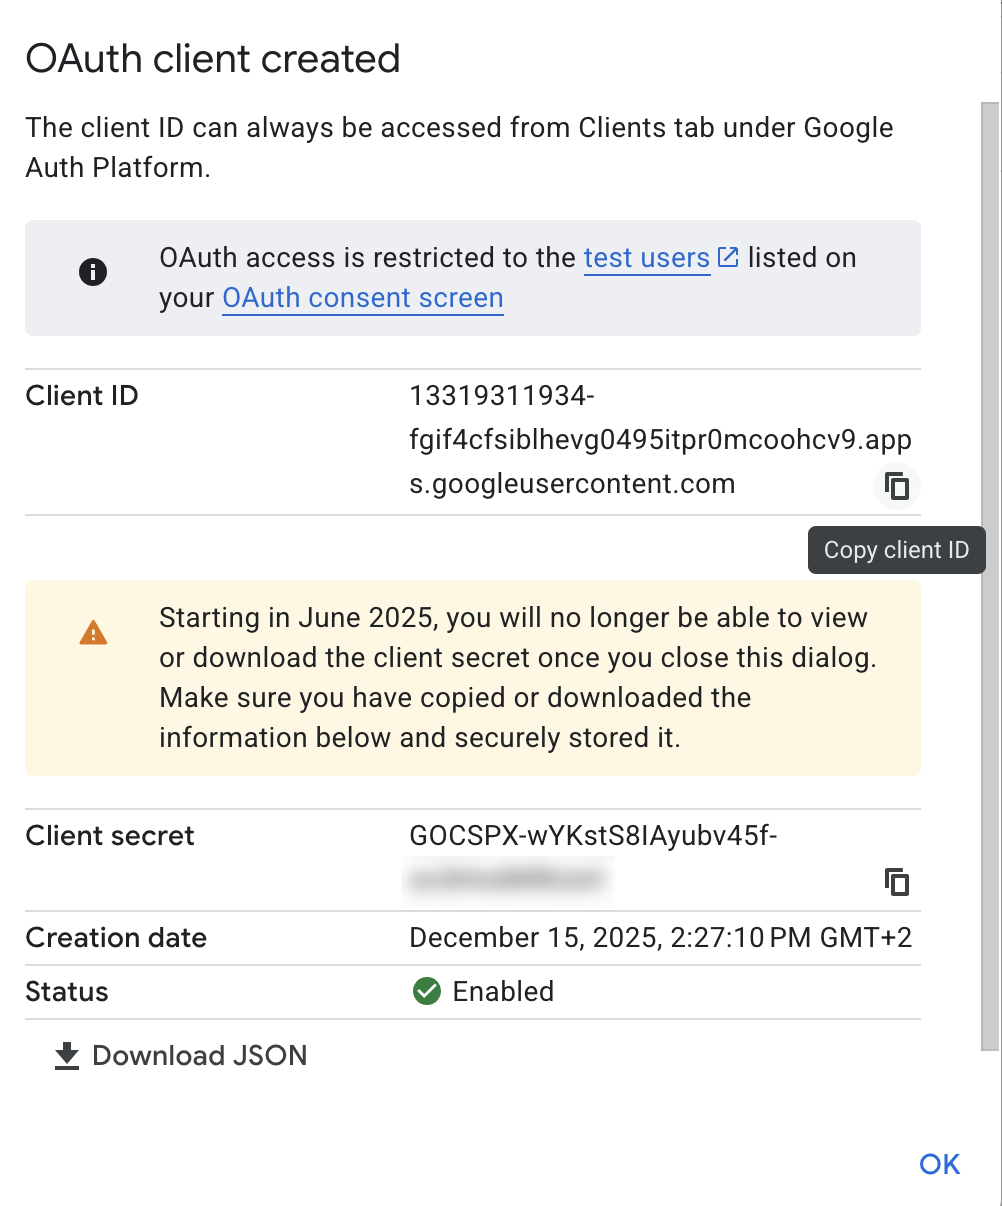
- Copy and paste to some safe place your Client ID and Client Secret. Do not show or pass them to anyone. Click "OK".
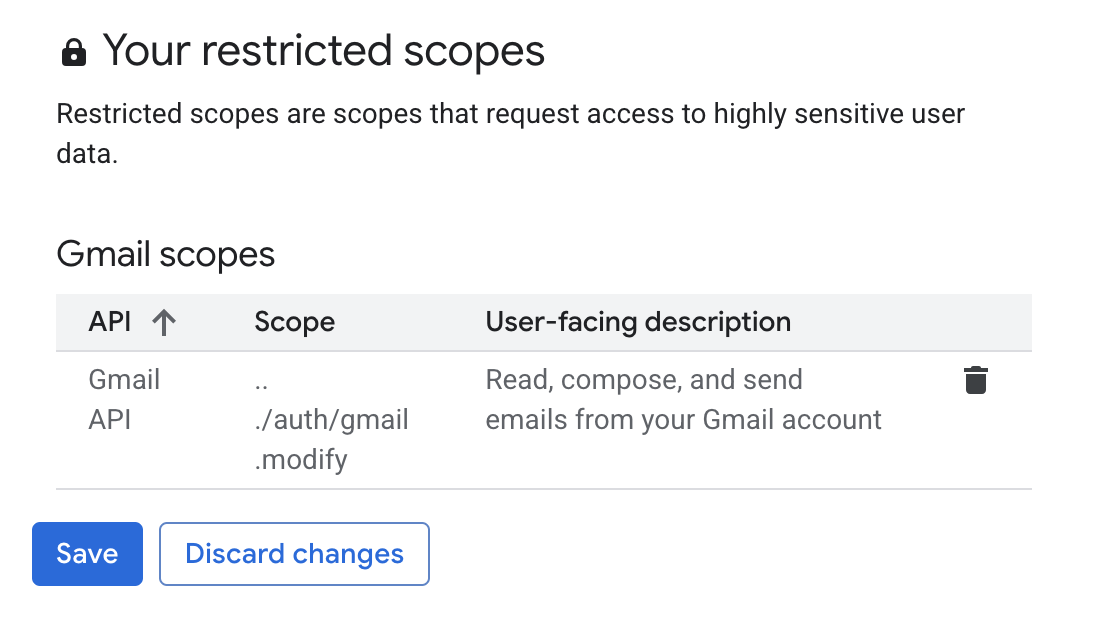
- Click on "Data Access" in the sidebar, then on "Add or remove scopes".
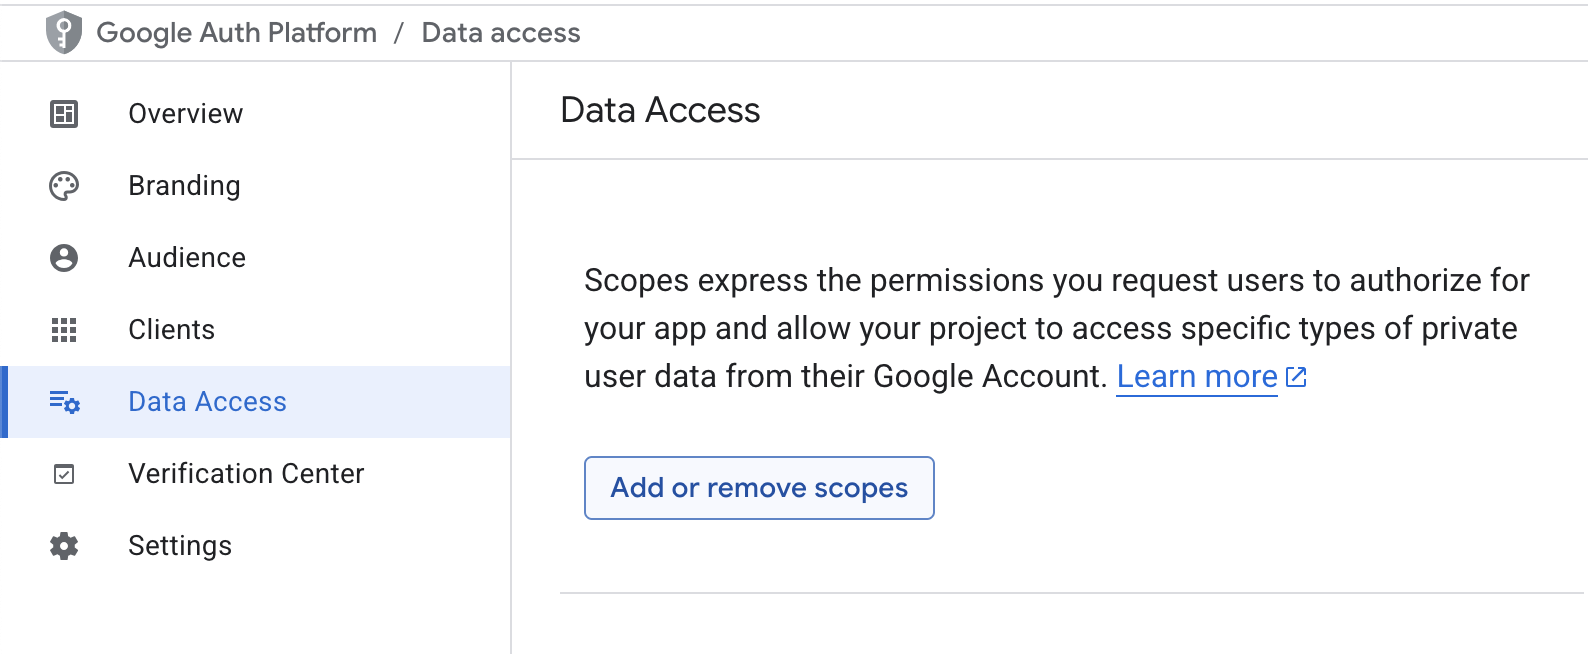
- Put in the Filter input "gmail.modify", click it and then mark the checkbox against "../auth/gmail.modify". Click "Update".

- Scroll the page down, click "Save".
- That's it. We've finished with GCC, now let's move to N8N, create the credential and the workflow itself.
Step 2: Create credential in your N8N
- Please, check that you're using the same N8N url that you stated on the step 15 of previous section. If you don't have your own self hosted N8N, please check my manual.
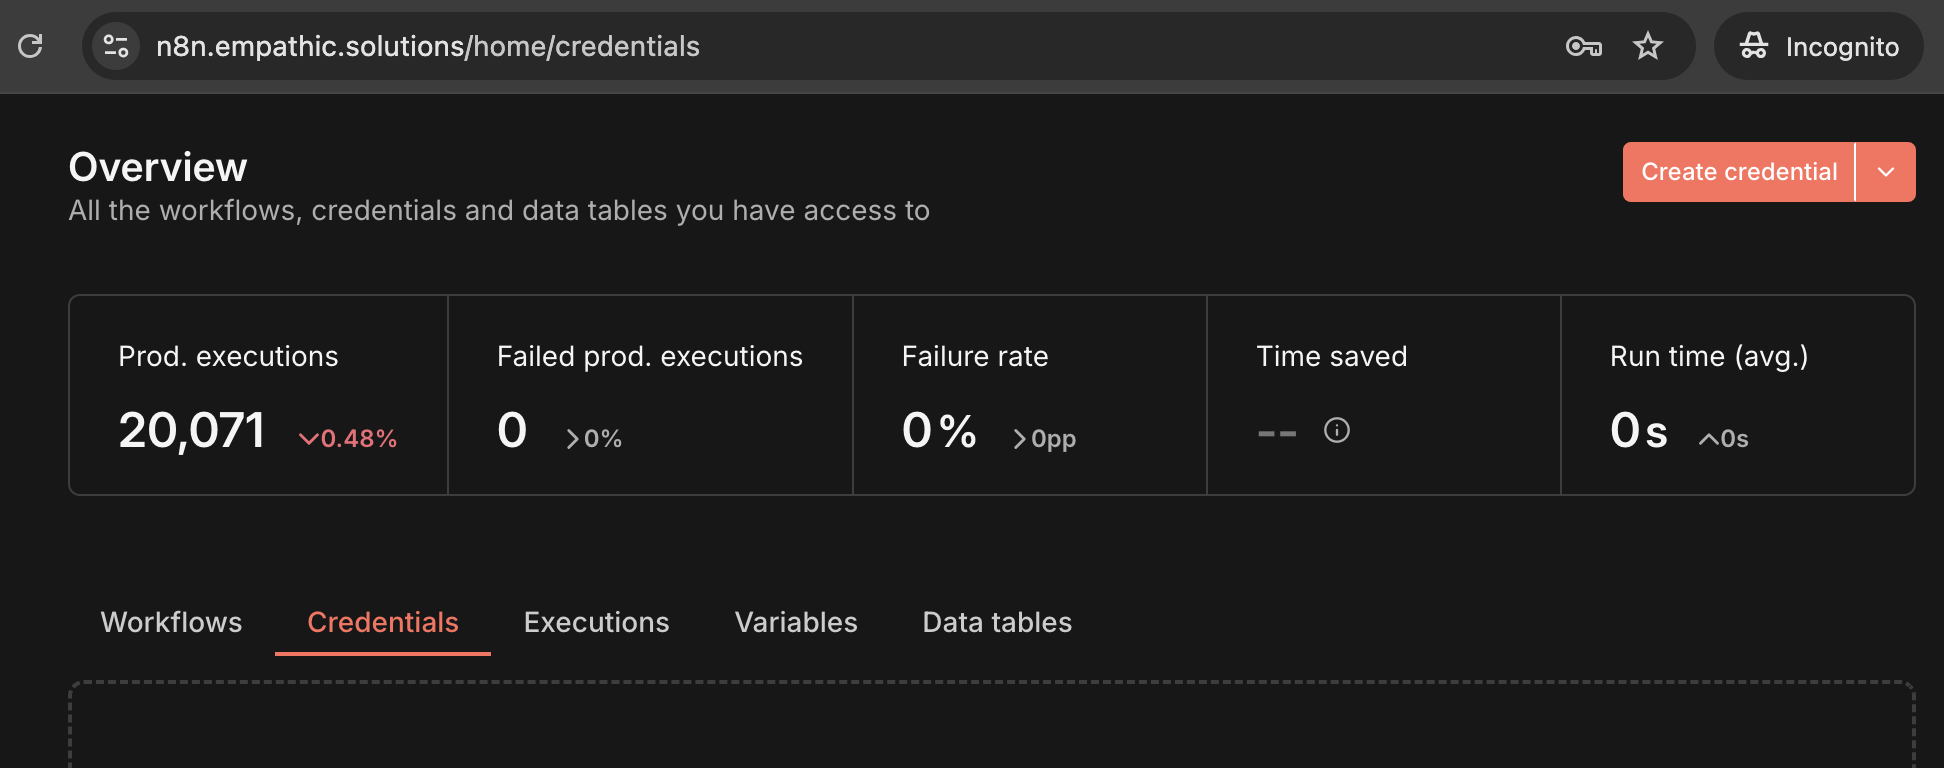
- Open your N8N and move to "Credentials" section.
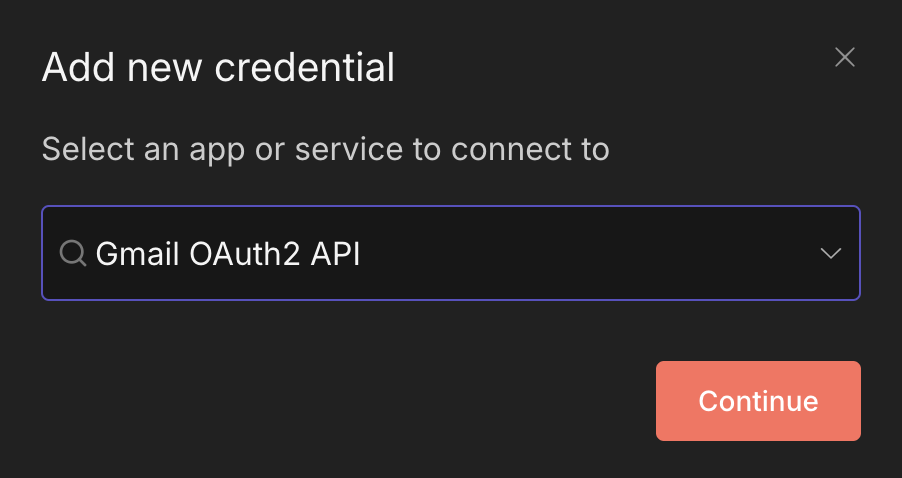
- Search for "Gmail OAuth2 API", click "Continue"
- Put your Client ID and Client Secret, then press "Save" button
- IMPORTANT: there's a bug in N8N, so you have to Close this window and open it again before pressing "Sign in with Google" button
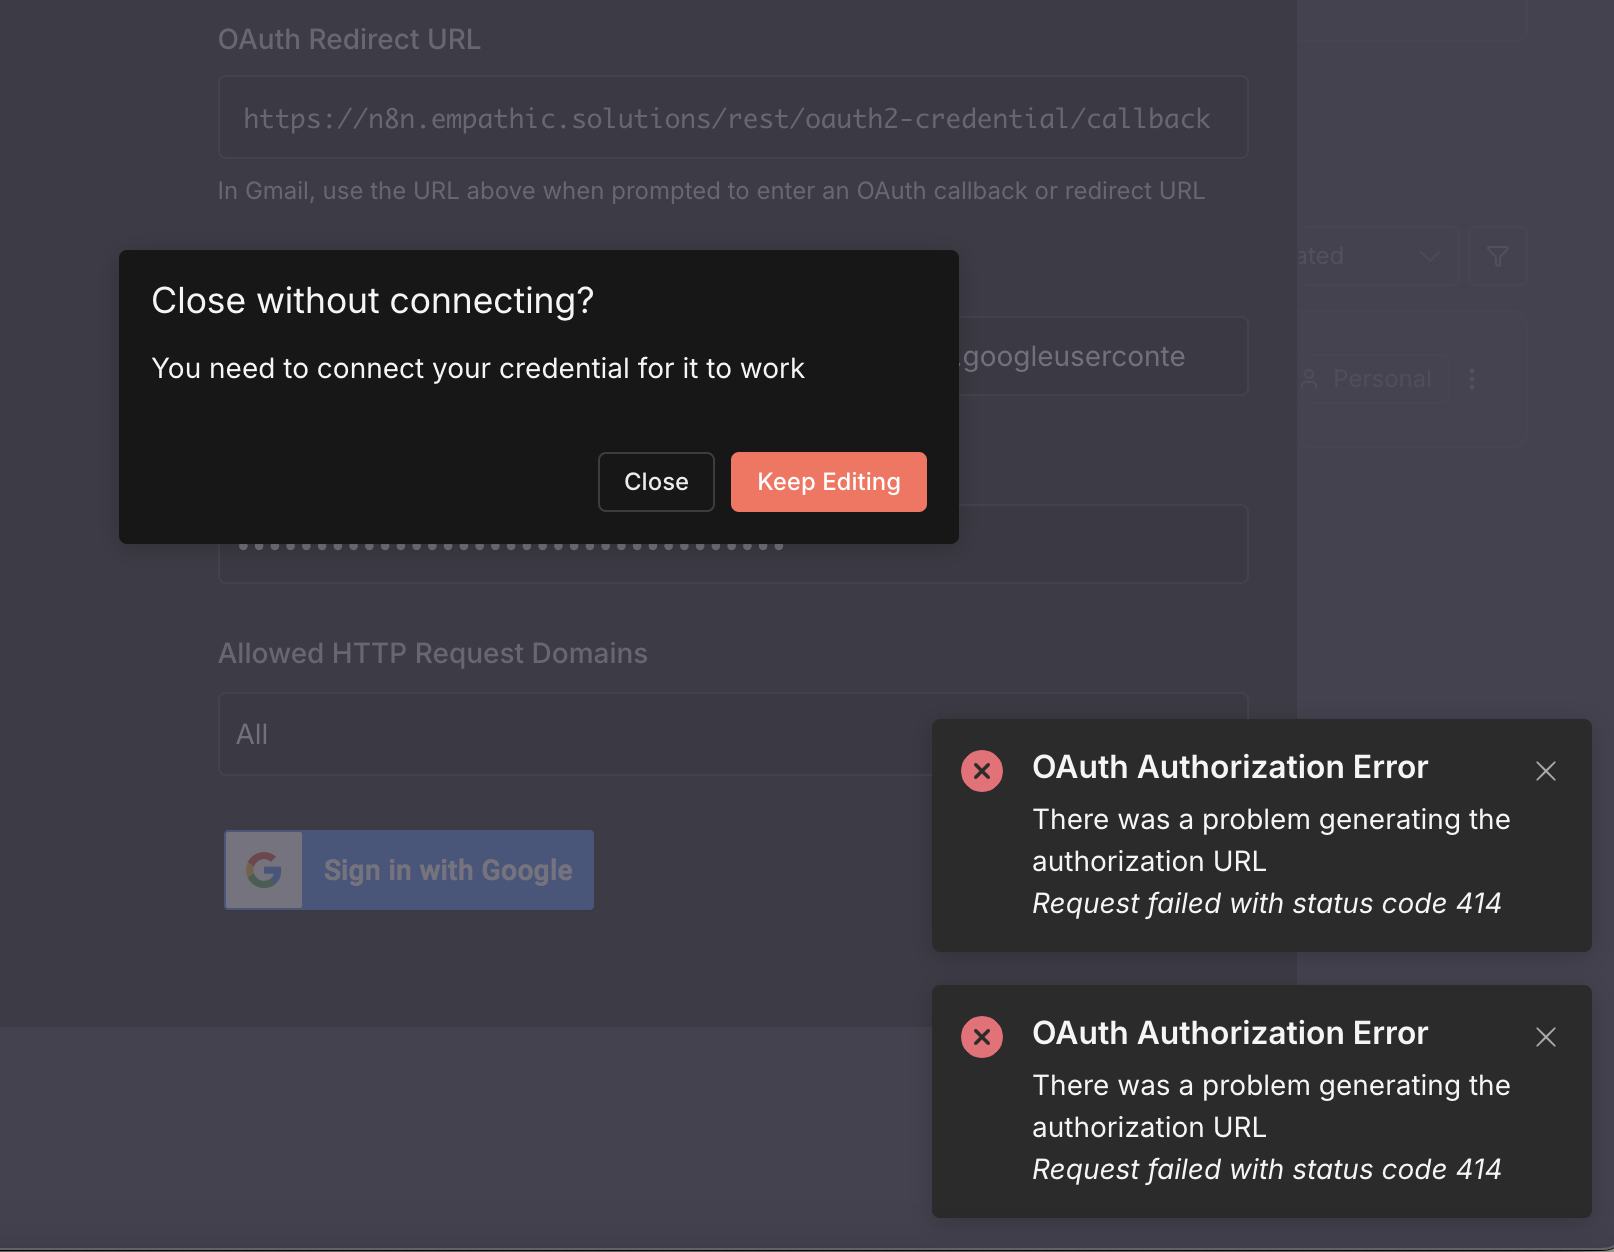
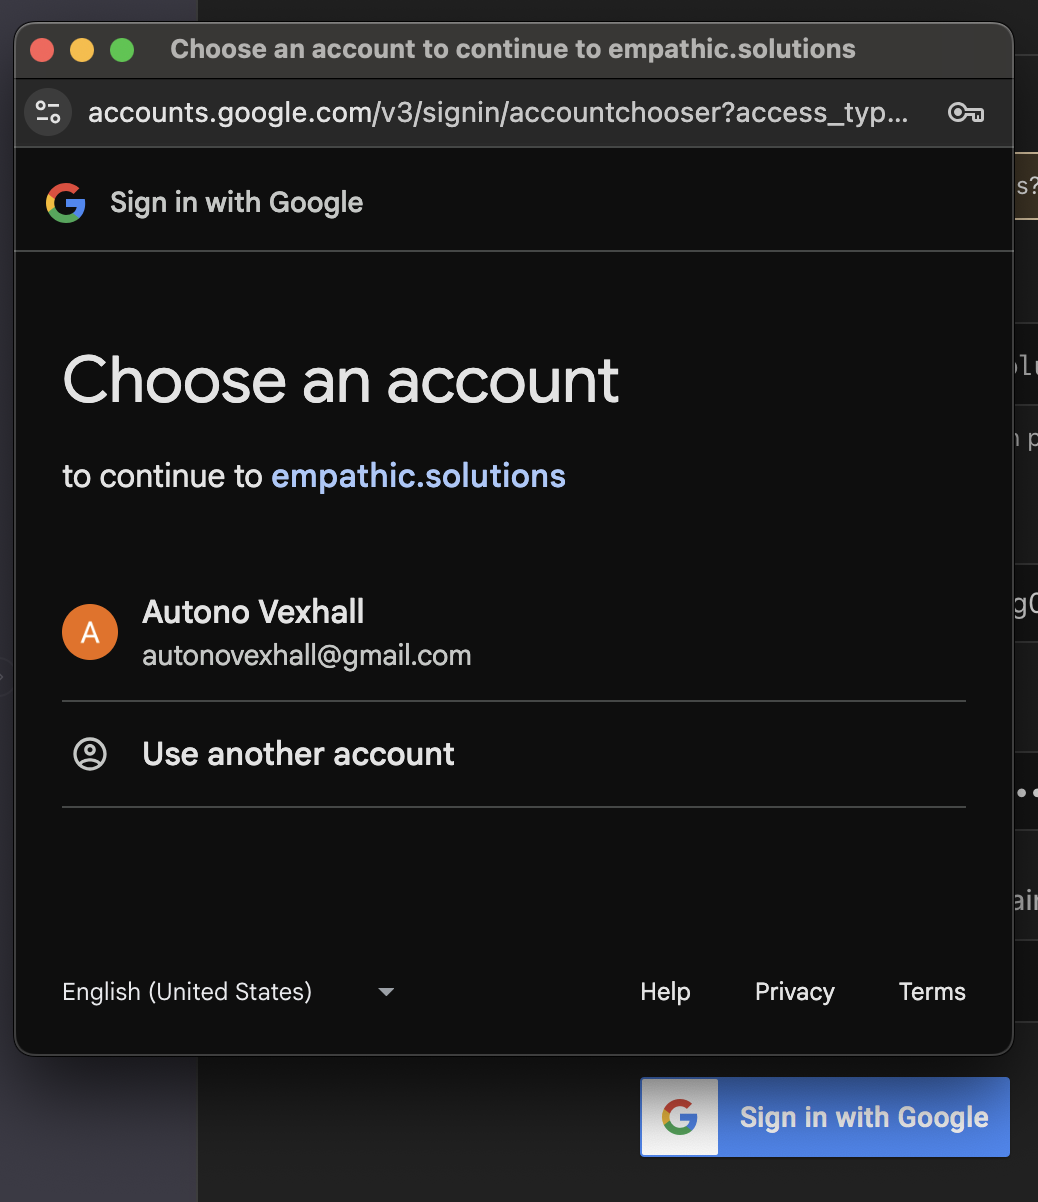
- Open credential again and press "Sign in with Google", click on your email
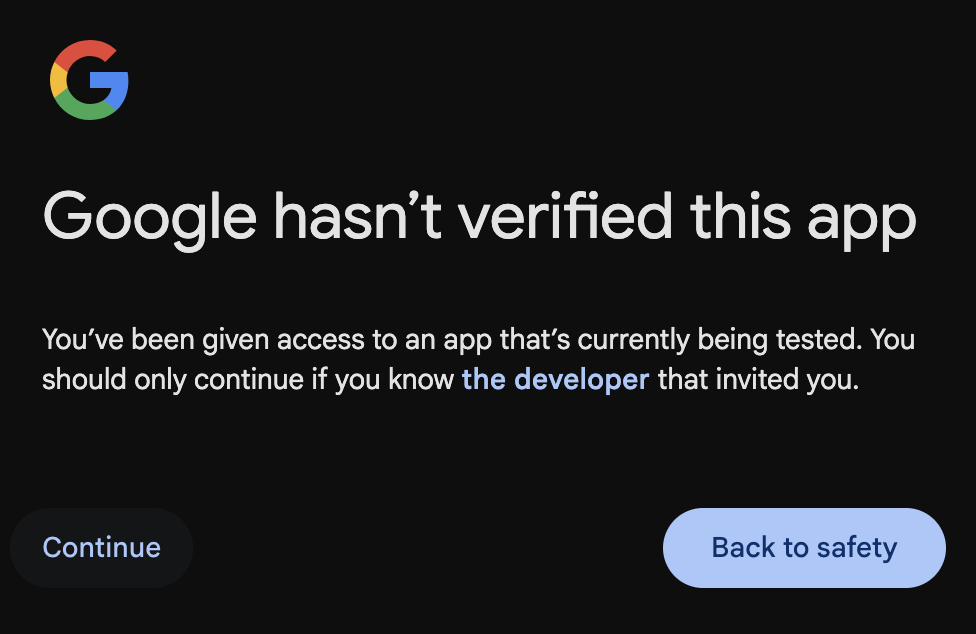
- Press "Continue" (on the left)
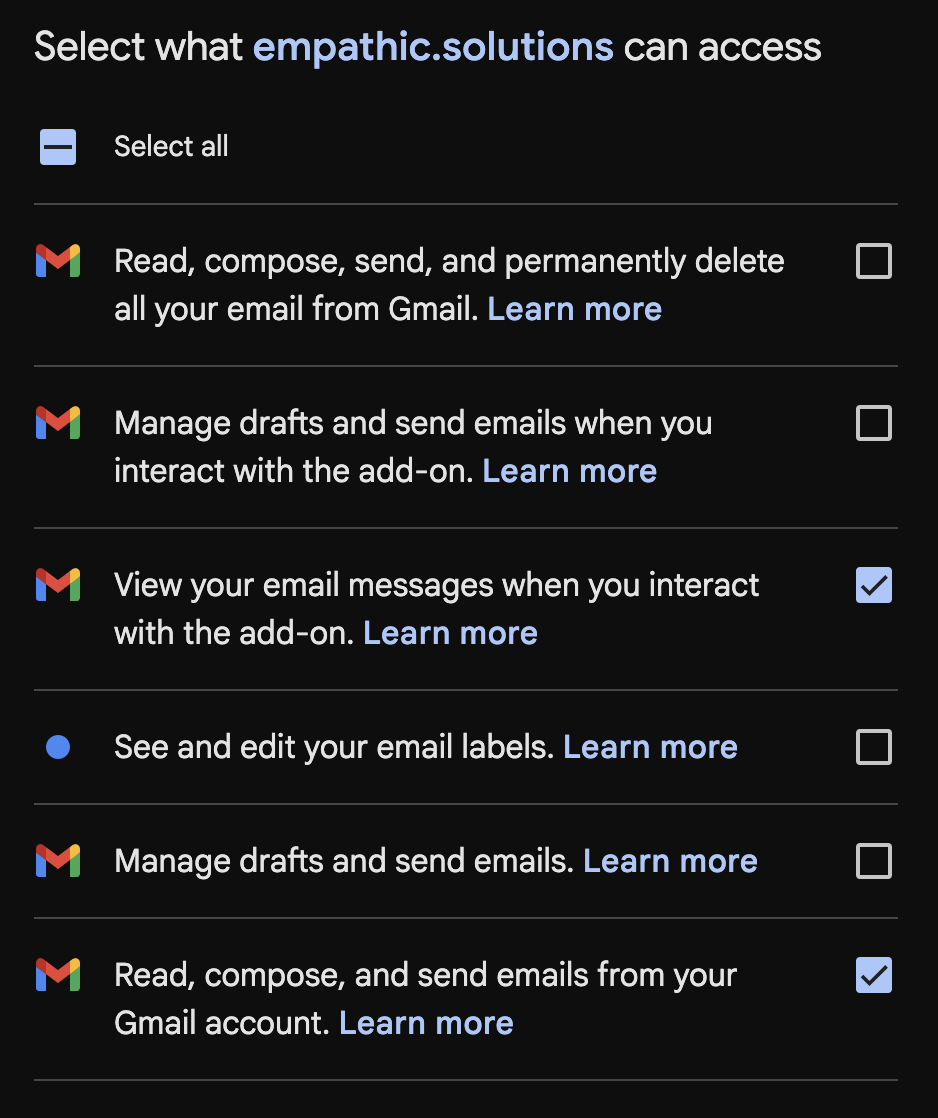
- Mark these checkboxes: "View your email messages when you interact with the add-on", "Read, compose, and send emails from your Gmail account"
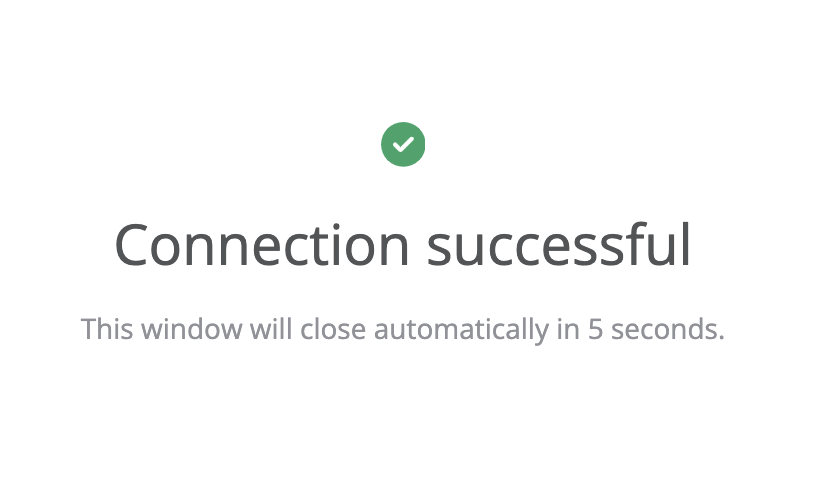
- Click "Continue" to see "Connection successful" screen
Step 3: Create workflow with Gmail Trigger node
- If you don't have your own self hosted N8N, please check my manual.
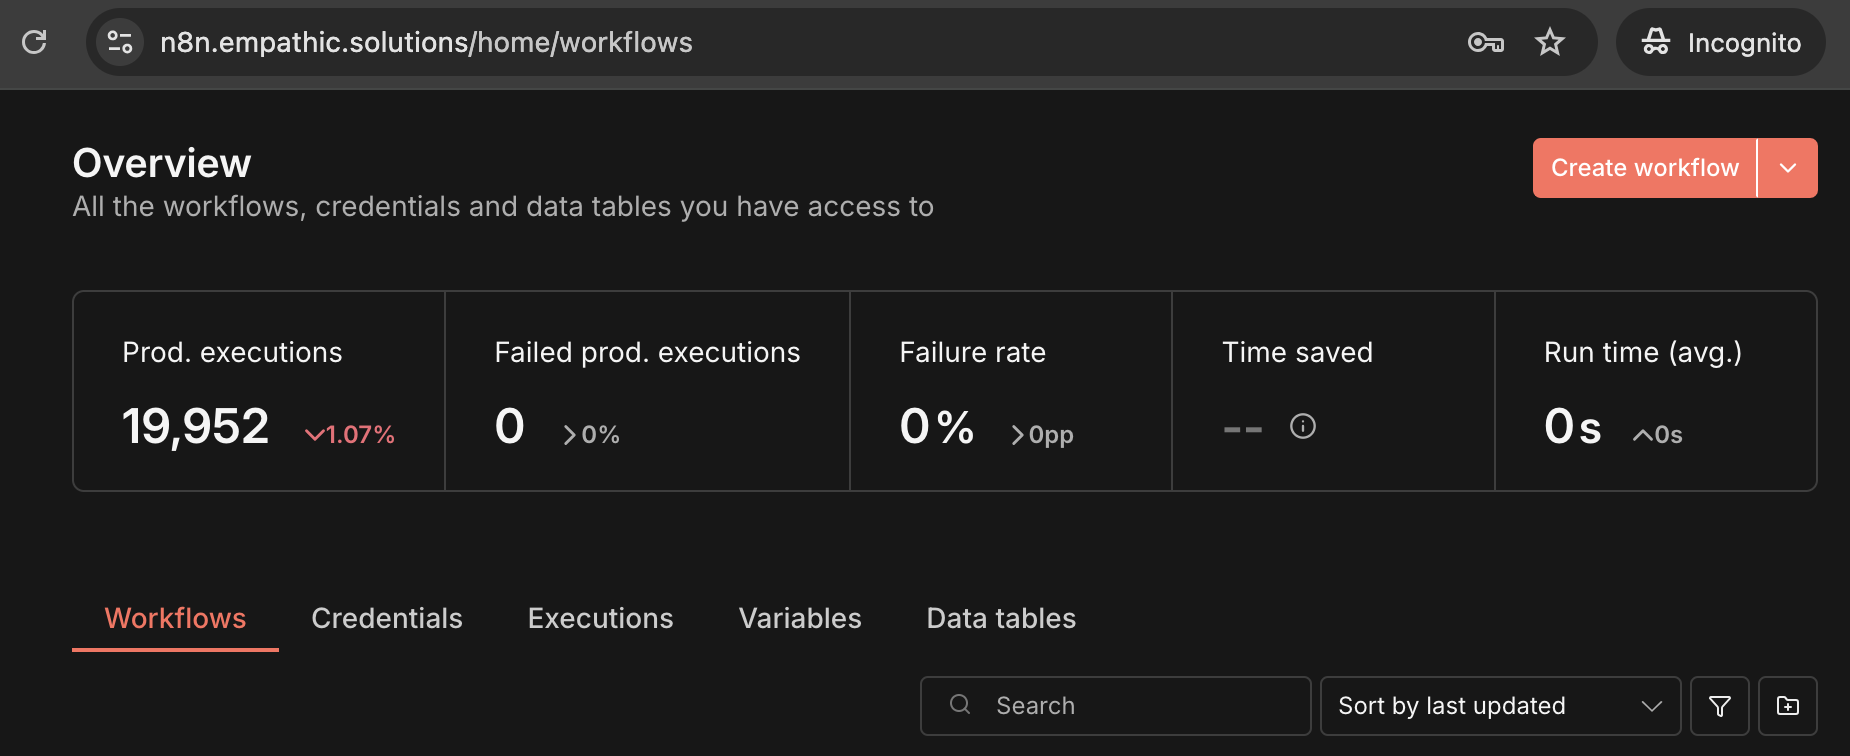
- Open your N8N and move to "Workflows" section, click "Create workflow".
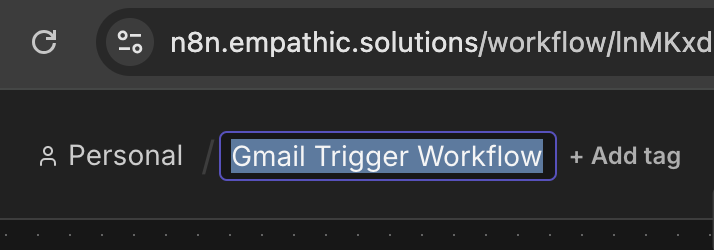
- Give it a name, like "Gmail Trigger Workflow" (optional).
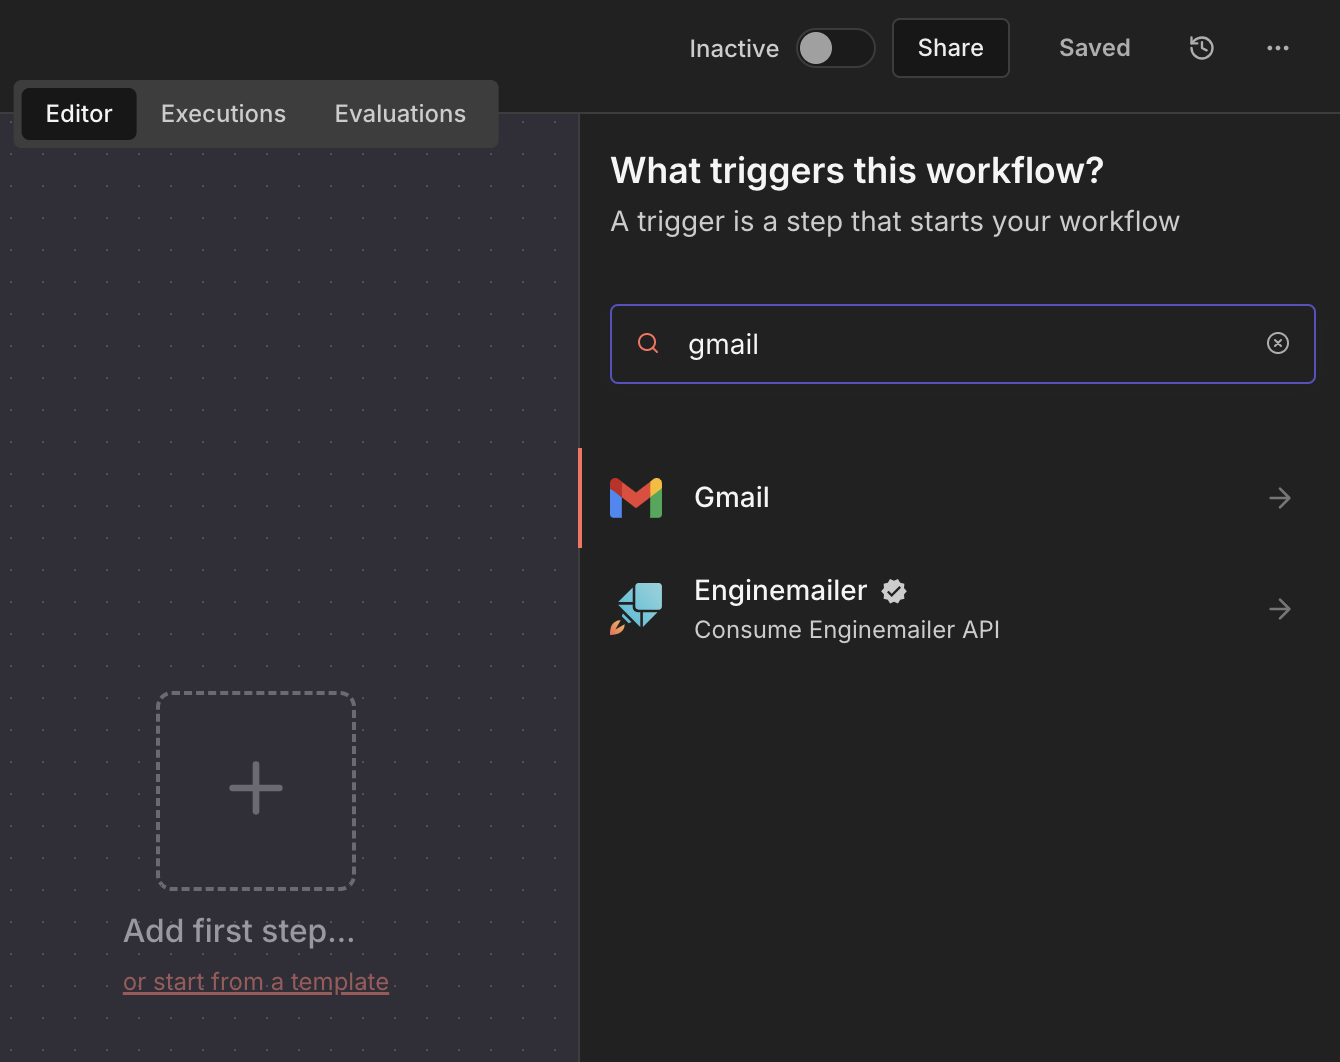
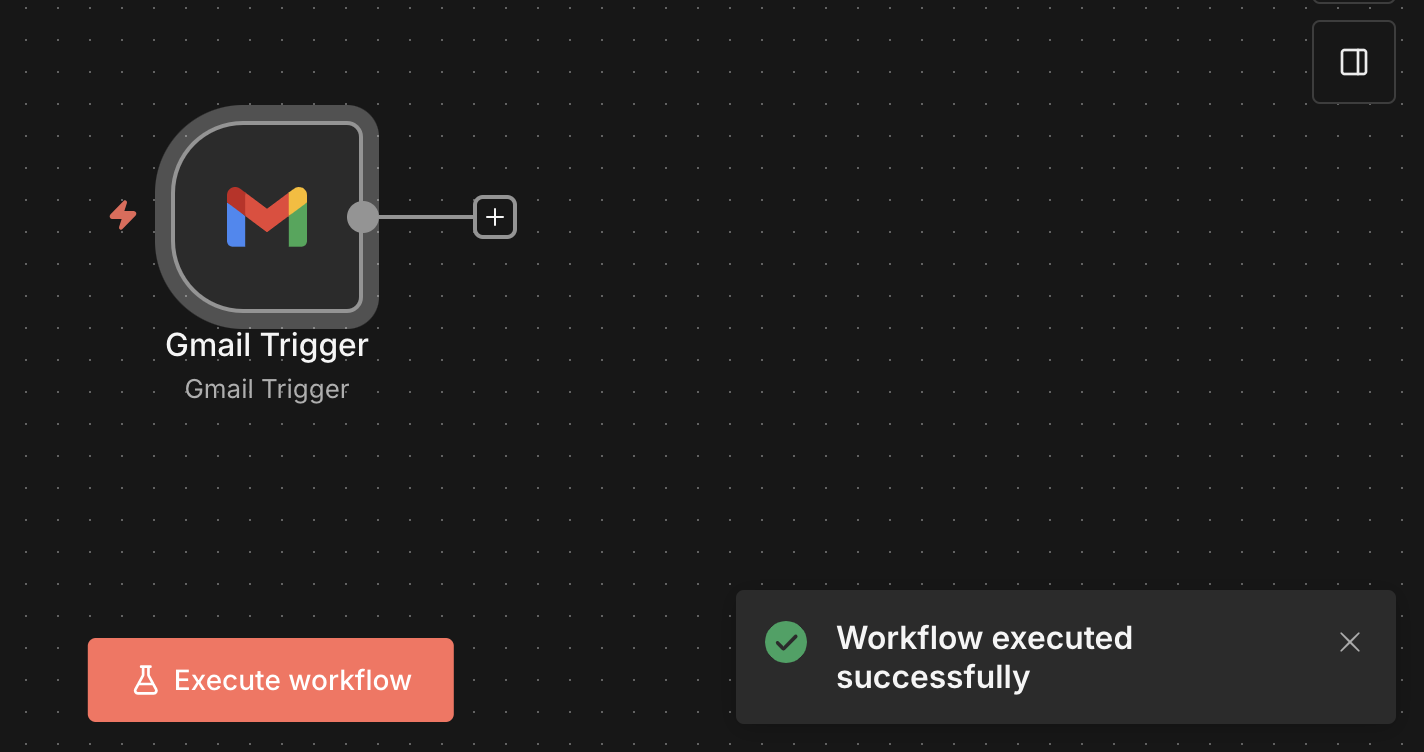
- Click "Add first step", search for "gmail", select "Gmail" node, then click "On message received".
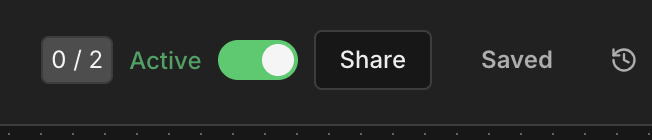
- Click "Back to canvas", then "Activate workflow"
- Click "Execute workflow" to see success message.
- Now, send test email from another email address, wait about a minute and check Executions tab.

- Double-click on Gmail node to see the text from the email you've sent.
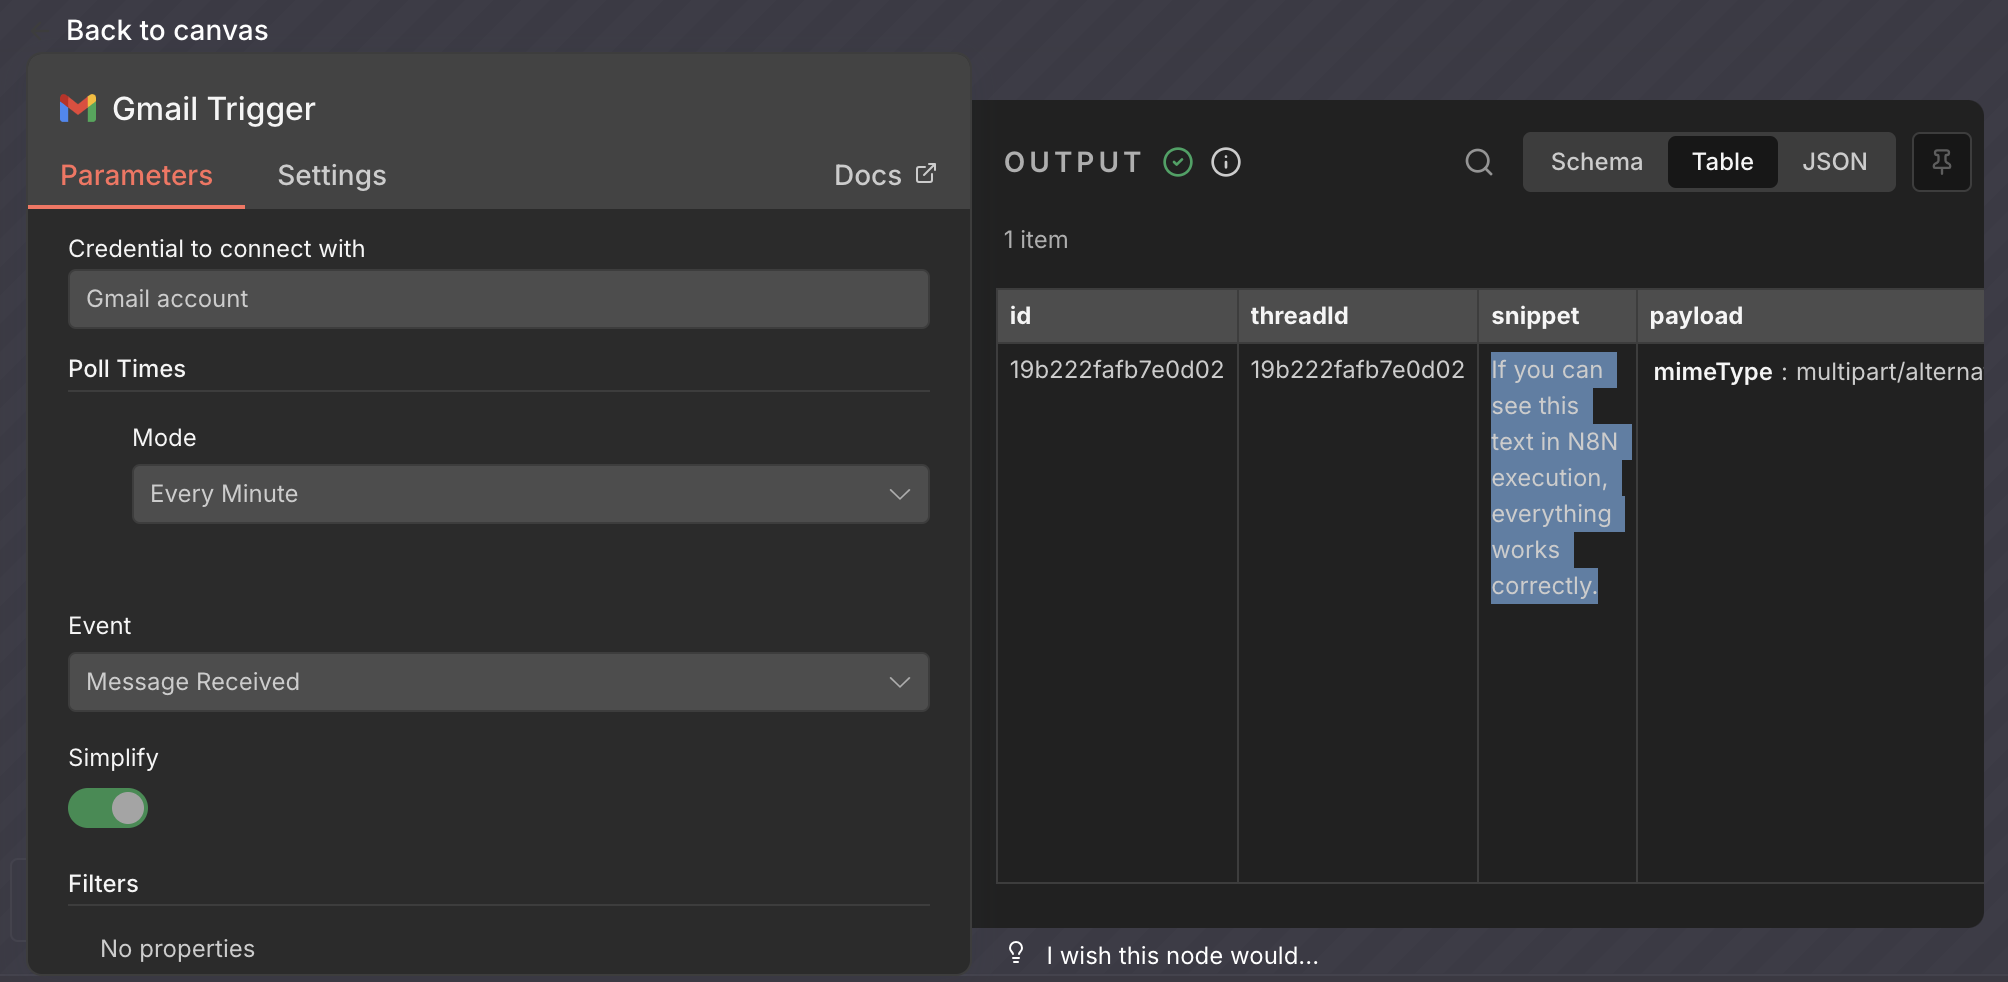
- ✅ That's it! You've set up a gmail node that executes each time you receive a new email.
Next time we'll take a closer look at what could be done with the email after receiving. For example, you can trigger other workflows depending on keywords, or send attachment to your personal telegram account. Please, feel free to share your ideas or requests. Maybe I'll tasks yours for the next guide :)
If you've found this tutorial useful, you can buy me a coffee: